I have a business question. Looking at what people are posting on their personal blogs it seems like the majority of us are interested in taking pictures of people. I think it might be fun to have a photo shoot with some volunteer models (which could be ourselves or could be friends, depending on who we can convince to help us out). Before I go through the effort of putting together a photo shoot and finding potential models I'd like to know first, that there's interest, and second, what people's schedules are like.
So, if you're interested in participating in a practice photo shoot, please leave a comment on this post with your name and what evenings or weekends will work. I'm thinking we should aim for about a month from now (late April/early May) and either a weekday evening, after 6:30 or 7 pm, or a Saturday afternoon, probably not much earlier than that (since that's when the light's good anyway). Also, if you have suggestions on potential models (i.e.--friends you think you can convince to pose for us) and suggestions on places for the shoot, include those.
Thanks,
Kristine
Friday, April 2, 2010


Easter challenge: O'Keefe
I'm calling this one a challenge because it's not an assignment per se. Please continue to work on the previous assignments and post them as you finish them. For this weekend, since it's Easter, let's focus on taking pictures of Easter-y things (eggs, pretty dresses, flowers, food, etc.). As you're taking these pictures, try to emulate the style of a Georgia O'Keefe painting (see here if you're not familiar with her work). Focus on colors (especially pastels) and smooth, gentle lines. Create a picture of beauty to celebrate this weekend and share it with us!
Tuesday, March 23, 2010
March assignment: Kristine
I didn't get out to take pictures nearly enough. Today was a beautiful day and I'm still not in the habit of grabbing my camera when I leave my front door. Sigh. Here's to hoping for more nice weather--and more photography!
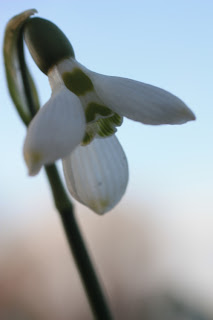
Even so, I did take a few pictures, mostly on a single walk with my (not terribly patient) daughter. My representational is a flower (obviously) that I was so excited to see! I love this part of spring!
I'm going to call the cupcake picture I took on St. Patrick's day my abstract because the focus was supposed to be on the circles (and it's not really a food picture).

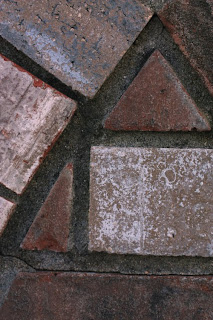
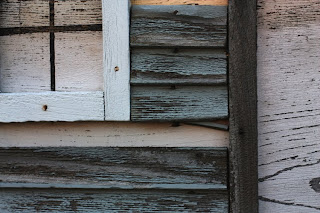
My last two pictures are textures (or so I'm claiming) of mailboxes in the neighborhood where I walk.
Even so, I did take a few pictures, mostly on a single walk with my (not terribly patient) daughter. My representational is a flower (obviously) that I was so excited to see! I love this part of spring!

I'm going to call the cupcake picture I took on St. Patrick's day my abstract because the focus was supposed to be on the circles (and it's not really a food picture).

My last two pictures are textures (or so I'm claiming) of mailboxes in the neighborhood where I walk.


Monday, March 22, 2010
March assignment: Jessica
This was a hard assignment for me... but I enjoyed it! But now I need your help :) The non-representational part really gets me. I think I understand representational and abstract though. Ummm... well, we'll see about that....
The top photo is representational:

I'm going to say this one is abstract:

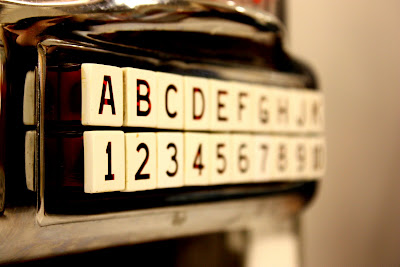
I *think* these two are non-representation but... ummm, help?

Let me know what you think...
The top photo is representational:
A flower... (yeay for spring!)

I'm going to say this one is abstract:
A portion of a chain...

I *think* these two are non-representation but... ummm, help?


Let me know what you think...
Tuesday, March 16, 2010
I heard a thousand blended notes
The next few days are supposed to be lovely around here, which makes me want to go out and take some pictures! So, I'm issuing a challenge to us all this week: take pictures every day. That's the first part, anyway. The second part will take a bit more thought. We had a lesson on line. If you haven't done that yet, work on that, but also, as you're taking pictures, think about whether they qualify as representational, abstract, or non-representational. I'll post pictures of the three below, but in brief, here are some thoughts on what each type of photo should embody (and those who have taken Wendy's class or have thought about this more than me--please chime in!)
Representational--it is what it is. Photos of objects where it is obvious what the object is. Includes portraiture, still life, landscape, and wildlife photography, among others. Most pictures will probably fall into this category.
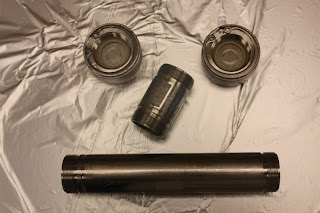
Abstract--a small portion or detail of a larger object; a picture of something that evokes another (non-related) object.
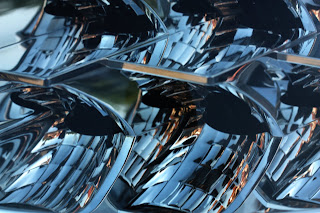
Non-representational--a detail or texture where the identity of the original object is obscure.
The dividing line between categories can be fuzzy, so I expect there will be some discussion of why someone thinks an image is abstract vs. non-representational. While a lot of us are already pretty good at representational, the other two tend to be more of a challenge. Getting better at the other types of photography/art will add depth to your photography--if you think about the truly stellar photo albums you've looked at, you'll notice that they mix all of the above types of art in to create not just images of the event, but also capture the emotions.
I'd like to see everyone post at least three images (preferably six), one or two in each category (representational, abstract, and non-representational) and I'd like to see them by Sunday, March 21. Take advantage of the next few days of good weather and take some pictures of the emerging spring, of your kids erupting from the buildings we've kept them imprisoned in for the last months, or of anything else that strikes your fancy. And have FUN!
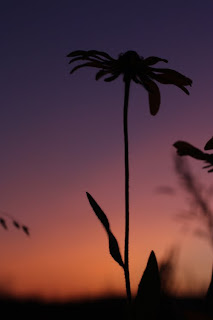
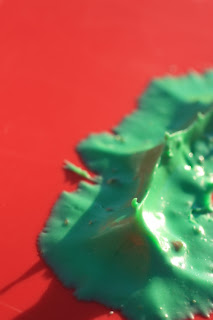
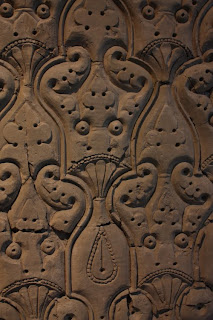
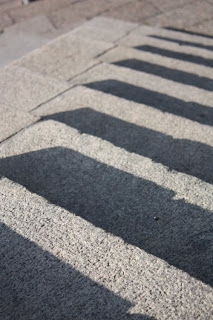
Representational--it is what it is. Photos of objects where it is obvious what the object is. Includes portraiture, still life, landscape, and wildlife photography, among others. Most pictures will probably fall into this category.
Abstract--a small portion or detail of a larger object; a picture of something that evokes another (non-related) object.
Non-representational--a detail or texture where the identity of the original object is obscure.
The dividing line between categories can be fuzzy, so I expect there will be some discussion of why someone thinks an image is abstract vs. non-representational. While a lot of us are already pretty good at representational, the other two tend to be more of a challenge. Getting better at the other types of photography/art will add depth to your photography--if you think about the truly stellar photo albums you've looked at, you'll notice that they mix all of the above types of art in to create not just images of the event, but also capture the emotions.
I'd like to see everyone post at least three images (preferably six), one or two in each category (representational, abstract, and non-representational) and I'd like to see them by Sunday, March 21. Take advantage of the next few days of good weather and take some pictures of the emerging spring, of your kids erupting from the buildings we've kept them imprisoned in for the last months, or of anything else that strikes your fancy. And have FUN!


Friday, March 12, 2010
Fun Photoshop Tutorial
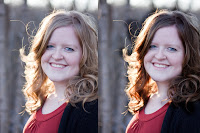
So, this tutorial won't really help in improving your images...but I thought it was fun since I never change my hair color! (This youtube channel actually has quite a bit of useful portrait tutorials as well!)
Changing Hair Color: http://www.youtube.com/watch?v=bHAgz83nhQ8&feature=channel
Changing Hair Color: http://www.youtube.com/watch?v=bHAgz83nhQ8&feature=channel

Thursday, February 4, 2010
Editing: Margot
I've been using Photoshop for years now for basic editing and for the life of me could not figure out what an 'action' was (I haven't watched the tutorial yet). I just opened Photoshop tonight and figured it out. All along it was sitting right next to the 'history' menu I use all the time!
I was going to avoid this assignment because I can spend hours clicking through every option until my photo looks just the way I like it--I just start pushing buttons and see what I get. But I did it anyway since it's fun.


I was going to avoid this assignment because I can spend hours clicking through every option until my photo looks just the way I like it--I just start pushing buttons and see what I get. But I did it anyway since it's fun.


my nephew, Matt. Crop, soft light, lighten, warming filter (85), shadow25/highlight15.


my sister and her family. I really want to go back and get this shot without them in it. I love this bridge.
Crop and rotate left, black&white, hard light, lighten, sharpen, shadow/highlight, (and maybe something else that I forgot).


my niece, Emily. Crop, brighten & more contrast, soft light, shadow 25%.
Wednesday, February 3, 2010
Editing: Jessica
I don't know about anyone else, but I am having so much fun with editing after getting tips from Kim. I was always terrified of photoshop and now I'm not :) When I learn to do new editing skills I tend to go over board and do to much to my photos. I have been trying not to do this. If you have any tips or pointers for me, let me know.
This photo I took in November and all the pictures I took in this spot turned out really gray. I tried editing in Picnik and I didn't like what I came up with.

In photoshop I added a "Soft Light" layer (Pioneer Woman has a tutorial on how to do this but with "Hard Light" HERE). And then I used PW warmer action (40%) and this is what I came up with:
I like how the photo pops a little now that it isn't so flat and gray. I also like that there is a little more color in her skin tone. But I am worried that I went a little over the top....
This picture is a favorite of my son. In photoshop I used PW seventies action, quick burn action and sharpen action (too much?)
This photo I took in November and all the pictures I took in this spot turned out really gray. I tried editing in Picnik and I didn't like what I came up with.
Here is the original:

In photoshop I added a "Soft Light" layer (Pioneer Woman has a tutorial on how to do this but with "Hard Light" HERE). And then I used PW warmer action (40%) and this is what I came up with:

I like how the photo pops a little now that it isn't so flat and gray. I also like that there is a little more color in her skin tone. But I am worried that I went a little over the top....
This picture is a favorite of my son. In photoshop I used PW seventies action, quick burn action and sharpen action (too much?)
Original:

Edit:

I liked how the seventies action toned down the red in his skin. I also like the contrast that the edge burn creates. What do you think?
Thursday, January 28, 2010
Tutorial!
Hey all! So, just to give you a little background on me in regards to my editing "experience". I graduated from Purdue in Computer Graphics technology where I learned the ins and outs of Photoshop among other things. We did a little bit with pictures (manipulations, restorations, etc.), but not a ton with editing. After I graduated, I discovered some new "worlds" in Photoshop...and I fell in love. haha! Anyway, I know some of you don't currently have Photoshop, but the good news is that you can download 30 day trials from Adobe.com to get you through these dull winter days (trust me, it WILL brighten your day!). Here is the link to download the trial:
http://www.adobe.com/products/photoshop/photoshop/
You will need an Adobe.com account, but they don't spam and I don't even get e-mails from them very frequently. And, after your 30 day trial of Photoshop expires, you can move on to Elements (photoshop lite). And, after that hopefully they'll release the beta version of CS5. You can usually keep those for longer than 30 days. Now, one note to make is that the 30 day trial you can download from Adobe.com is Photoshop CS4. In my tutorial, I'm using Photoshop CS3. There are some differences, but for the most part they are fairly similar. If you have any questions about where to find things that I've done in CS3 on CS4 just ask. I've used and have access to both.
Sooo, here is my tutorial! Because it's so huge, I've also added a link to view it in a new tab: Click here.
OK, so after I posted the video embedded in this post...It was too huge. So, to see the video tutorial, just click on the link above. Let me know if you have any problems.
Free Actions Resources (and other great tutorials):
Coffee Shop Photography Blog
Pioneer Woman Photography Actions (and really great Tutorials!)
Smashing Magazine's Favorite Actions (I think most are free)
And, just searching for free photoshop actions can get some good results as well, but those are some sites that I really like. Some actions work better with certain kinds of pictures obviously. It's a really good way to get started editing and learning the Photoshop interface.
I'd also like some feedback on the tutorial. I'm currently getting a master's in educational technology and will be creating a photography e-learning course (or components of the course) this semester. So, I will be making quite a few similar tutorials throughout the next few months. And as I mentioned in the video, ask me questions if you have them. I seriously love photoshop and editing! And, if you have any other ideas for tutorials, e-mail me. I will happily use your ideas for my class. :)
And, here are some before and after photos.
Before.

After.

Before.

After.

And my all time favorite photo (I think I've posted this photo before...).
Before.

After.

P.S. Thanks for asking me to do this Kristine. It was a lot of fun!
http://www.adobe.com/products/photoshop/photoshop/
You will need an Adobe.com account, but they don't spam and I don't even get e-mails from them very frequently. And, after your 30 day trial of Photoshop expires, you can move on to Elements (photoshop lite). And, after that hopefully they'll release the beta version of CS5. You can usually keep those for longer than 30 days. Now, one note to make is that the 30 day trial you can download from Adobe.com is Photoshop CS4. In my tutorial, I'm using Photoshop CS3. There are some differences, but for the most part they are fairly similar. If you have any questions about where to find things that I've done in CS3 on CS4 just ask. I've used and have access to both.
Sooo, here is my tutorial! Because it's so huge, I've also added a link to view it in a new tab: Click here.
OK, so after I posted the video embedded in this post...It was too huge. So, to see the video tutorial, just click on the link above. Let me know if you have any problems.
Free Actions Resources (and other great tutorials):
Coffee Shop Photography Blog
Pioneer Woman Photography Actions (and really great Tutorials!)
Smashing Magazine's Favorite Actions (I think most are free)
And, just searching for free photoshop actions can get some good results as well, but those are some sites that I really like. Some actions work better with certain kinds of pictures obviously. It's a really good way to get started editing and learning the Photoshop interface.
I'd also like some feedback on the tutorial. I'm currently getting a master's in educational technology and will be creating a photography e-learning course (or components of the course) this semester. So, I will be making quite a few similar tutorials throughout the next few months. And as I mentioned in the video, ask me questions if you have them. I seriously love photoshop and editing! And, if you have any other ideas for tutorials, e-mail me. I will happily use your ideas for my class. :)
And, here are some before and after photos.
Before.

After.

Before.

After.

And my all time favorite photo (I think I've posted this photo before...).
Before.

After.

P.S. Thanks for asking me to do this Kristine. It was a lot of fun!
Wednesday, January 27, 2010
New challenge!
Since it's been pretty quiet around here (and I don't blame anybody--the weather doesn't make me want to take any pictures either) I think we should spend the next month or two working on editing photos. There is no substitute for taking a good photo in the first place; that said, a good photo can be turned into a stellar photo with just a few tweaks. Kim Davis will give us some instruction, and then what I'd like everyone to do is take one or two old photos and see what you can do to improve them. Post the original and the improved photo and then comment like mad on other people's pictures.
Tuesday, January 26, 2010
just wanted to share
with you all, that I have a new website:
go check it out, become a follower of my new blog as well.. (link is on the site!)
Hope everyone is staying warm and taking lots of pictures!! =)
~ elizabeth
Tuesday, December 29, 2009
Editing Software
Hey all! I don't know if it's OK to post this here (if not, I can move it), but I just thought I'd share this (another) blog post I found on good free photo editing software. Obviously Photoshop is the "king" hence it's cost, but here is the list of good (free) Photoshop alternatives in case you're interested:
http://www.thephotoargus.com/freebies/11-outstanding-free-alternatives-to-photoshop/
http://www.thephotoargus.com/freebies/11-outstanding-free-alternatives-to-photoshop/
Wednesday, December 23, 2009
Lines. Margot.
So, I finally got a new camera and haven't been able to use it too much. These were taken with my point and shoot and aren't new pictures--I'm a total cheat.
I can't remember in which direction this was shot originally. So you can decide which you like better.


This one was originally tall but I thought I'd see what happened when I cropped it to the sun. I like it both ways but for different reasons. I'd also like to know how to take pictures with the sun that don't have large colored glares (the pink top right of the sun). Anyone know how?


Thursday, December 17, 2009
Lines: Kim
So, I tried taking pictures of lines without people, but I just wasn't happy with how it turned out. I really like it when people are in my photos too....
Here are a few of my recent photos of people with lines involved:
This was a teeter totter:

Pretty bridge:

Awesome fence:

This is such a busy time of the year, but oh so fun! Maybe I'll try to get more creative and expand to non people photos...I'm just not as good at the artsy, abstract stuff...and I don't enjoy it quite as much.
Here are a few of my recent photos of people with lines involved:
This was a teeter totter:

Pretty bridge:

Awesome fence:

This is such a busy time of the year, but oh so fun! Maybe I'll try to get more creative and expand to non people photos...I'm just not as good at the artsy, abstract stuff...and I don't enjoy it quite as much.
Sunday, November 22, 2009
Composition: Line
Lines guide our eyes through a photograph and can help shape the feeling of the image. For instance, your eyes follow the curve of this tendril along its path to the center, conveniently located in the top left-ish third of the image:

We attach meanings to certain types of lines. For instance, horizontal lines--horizons in particular--create a feeling of stability:

while vertical lines create a feeling of strength, power, or growth:


Vertical lines can be tough to photograph. You'll notice in most of my examples above, the lines aren't completely parallel to the edges of the photograph. It's pretty much unpreventable when taking pictures of tall things, so just be aware of it and try to keep the vertical lines parallel to one edge or the other, or pointing in the direction of a focal point in the image.
Diagonal lines can be either positive (extending from bottom left to top right) or negative (extending from bottom right to top left). This one has both (which is common):

In this image, two positive lines intersect a negative line formed by the right hand side of the wall. Although positive lines dominate the image, the fact that they are all diagonal gives the picture a feeling of being off-balance--very appropriate for the Museum of the Holocaust.

Here, a negative line, formed from the line of the wing to the arm of the statue, lends the picture a melancholy feel:

Here's the assignment: focus on using lines effectively in your pictures over the next two weeks (there won't be a new assignment next week due to thanksgiving). Try to take pictures of vertical, horizontal, and diagonal lines. Decide if you like positive or negative diagonal lines better (at least this week). Again, as you watch TV, pay attention to the images, particularly how they use lines to draw your eyes to the focal point of the image.
Good luck, and post at least three images in the next two weeks.

We attach meanings to certain types of lines. For instance, horizontal lines--horizons in particular--create a feeling of stability:

while vertical lines create a feeling of strength, power, or growth:


Vertical lines can be tough to photograph. You'll notice in most of my examples above, the lines aren't completely parallel to the edges of the photograph. It's pretty much unpreventable when taking pictures of tall things, so just be aware of it and try to keep the vertical lines parallel to one edge or the other, or pointing in the direction of a focal point in the image.
Diagonal lines can be either positive (extending from bottom left to top right) or negative (extending from bottom right to top left). This one has both (which is common):

In this image, two positive lines intersect a negative line formed by the right hand side of the wall. Although positive lines dominate the image, the fact that they are all diagonal gives the picture a feeling of being off-balance--very appropriate for the Museum of the Holocaust.

Here, a negative line, formed from the line of the wing to the arm of the statue, lends the picture a melancholy feel:

Here's the assignment: focus on using lines effectively in your pictures over the next two weeks (there won't be a new assignment next week due to thanksgiving). Try to take pictures of vertical, horizontal, and diagonal lines. Decide if you like positive or negative diagonal lines better (at least this week). Again, as you watch TV, pay attention to the images, particularly how they use lines to draw your eyes to the focal point of the image.
Good luck, and post at least three images in the next two weeks.
Commenting
Alright, I'm not the best about this either (obviously) but we all need to comment on one another's work. So, this week I want everyone to make a critical comment on everyone else's post. By critical I mean a comment that analyzes the image in some way, not one that says your picture is terrible. For example, (and as a segue into the next lesson) the curving line of the road heading off to the right really gives the image a feeling of going somewhere, which I think makes it a stronger picture. In comments, be polite, but honest--we're all looking to improve, not just be told how wonderful we are already.
Thanks!
Thanks!
Rule of thirds: Kristine
I apologize--it's been a rather busy couple of weeks. Here are my submissions for rule of thirds:

This one only follows the rule of thirds in that approximately the bottom 2/3 of the image are taken up by cake.


In these two, my daughter is pretty clearly in the top right 1/3 position. I particularly love the action and the expression of joy on her face in these.
Somewhat by way of explanation, my brother in law got married yesterday and I've been madly getting things done so I could leave for the weekend. Here are a few pictures I took at the wedding:


This one only follows the rule of thirds in that approximately the bottom 2/3 of the image are taken up by cake.


In these two, my daughter is pretty clearly in the top right 1/3 position. I particularly love the action and the expression of joy on her face in these.
Somewhat by way of explanation, my brother in law got married yesterday and I've been madly getting things done so I could leave for the weekend. Here are a few pictures I took at the wedding:


Subscribe to:
Posts (Atom)